


之前我一直使用Realm来做数据存储,从上手来讲半小时就可以将Realm非常良好的运用于你的项目当中。正值我有一个假期,所以咬牙决定尝试下CoreData,实话说真的需要耐心和不断的尝试,这东西经历多年,被果子上万工程师来回补丁着实不易。写这个小纸条记录一下踩过的坑,应该会一直记录到CloudKit。坑已经挖在这里了,慢慢记录吧。对于CoreData我感觉在接下来的Xcode中还会不断的改进,现在明显还有不少临时手段,这系列小纸条均基于Swift 5.5, iOS 15, Xcode 13 。
创建项目
如果你的项目之前没有包括CoreData相关的内容,加起来还是比较容易的,但是如果你是新的项目,我还是比较喜欢项目模板中有关CoreData的代码。创建项目时可以勾选上CoreData:
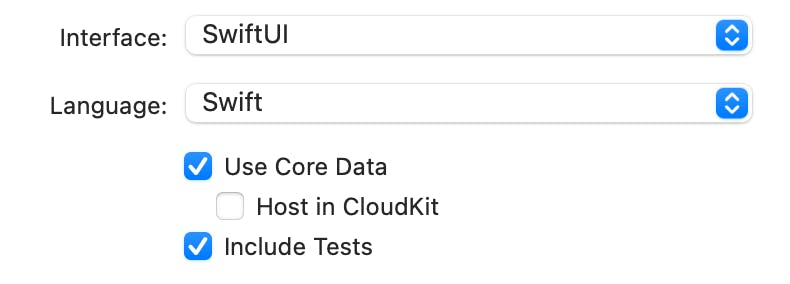
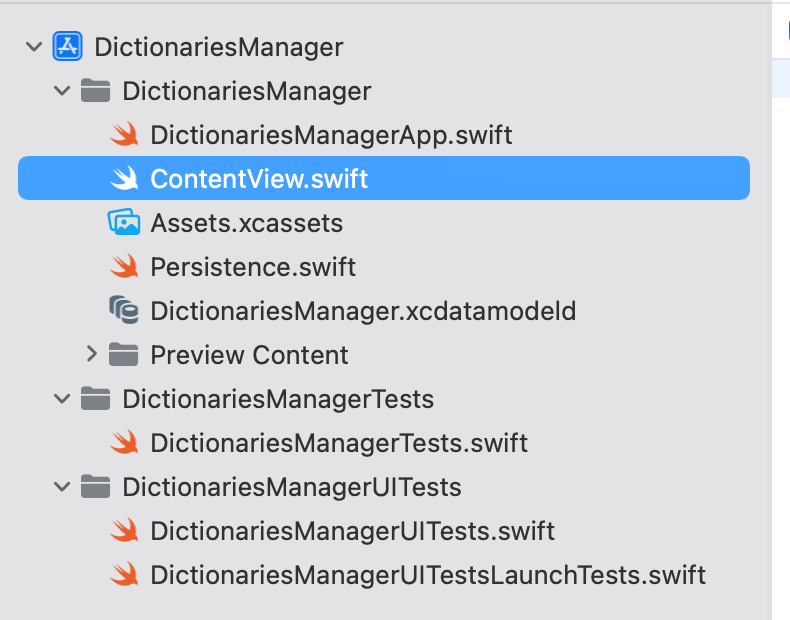
如果同时勾选上Host in CloudKit你会发现代码只是Presitence不同,剩下的完全一样。这里我并没有勾选这个选项,等到CloudKit系列时再考虑这些。创建好的项目会自动生成有关CoreData的系列文件,如下图:
CoreData模板说明
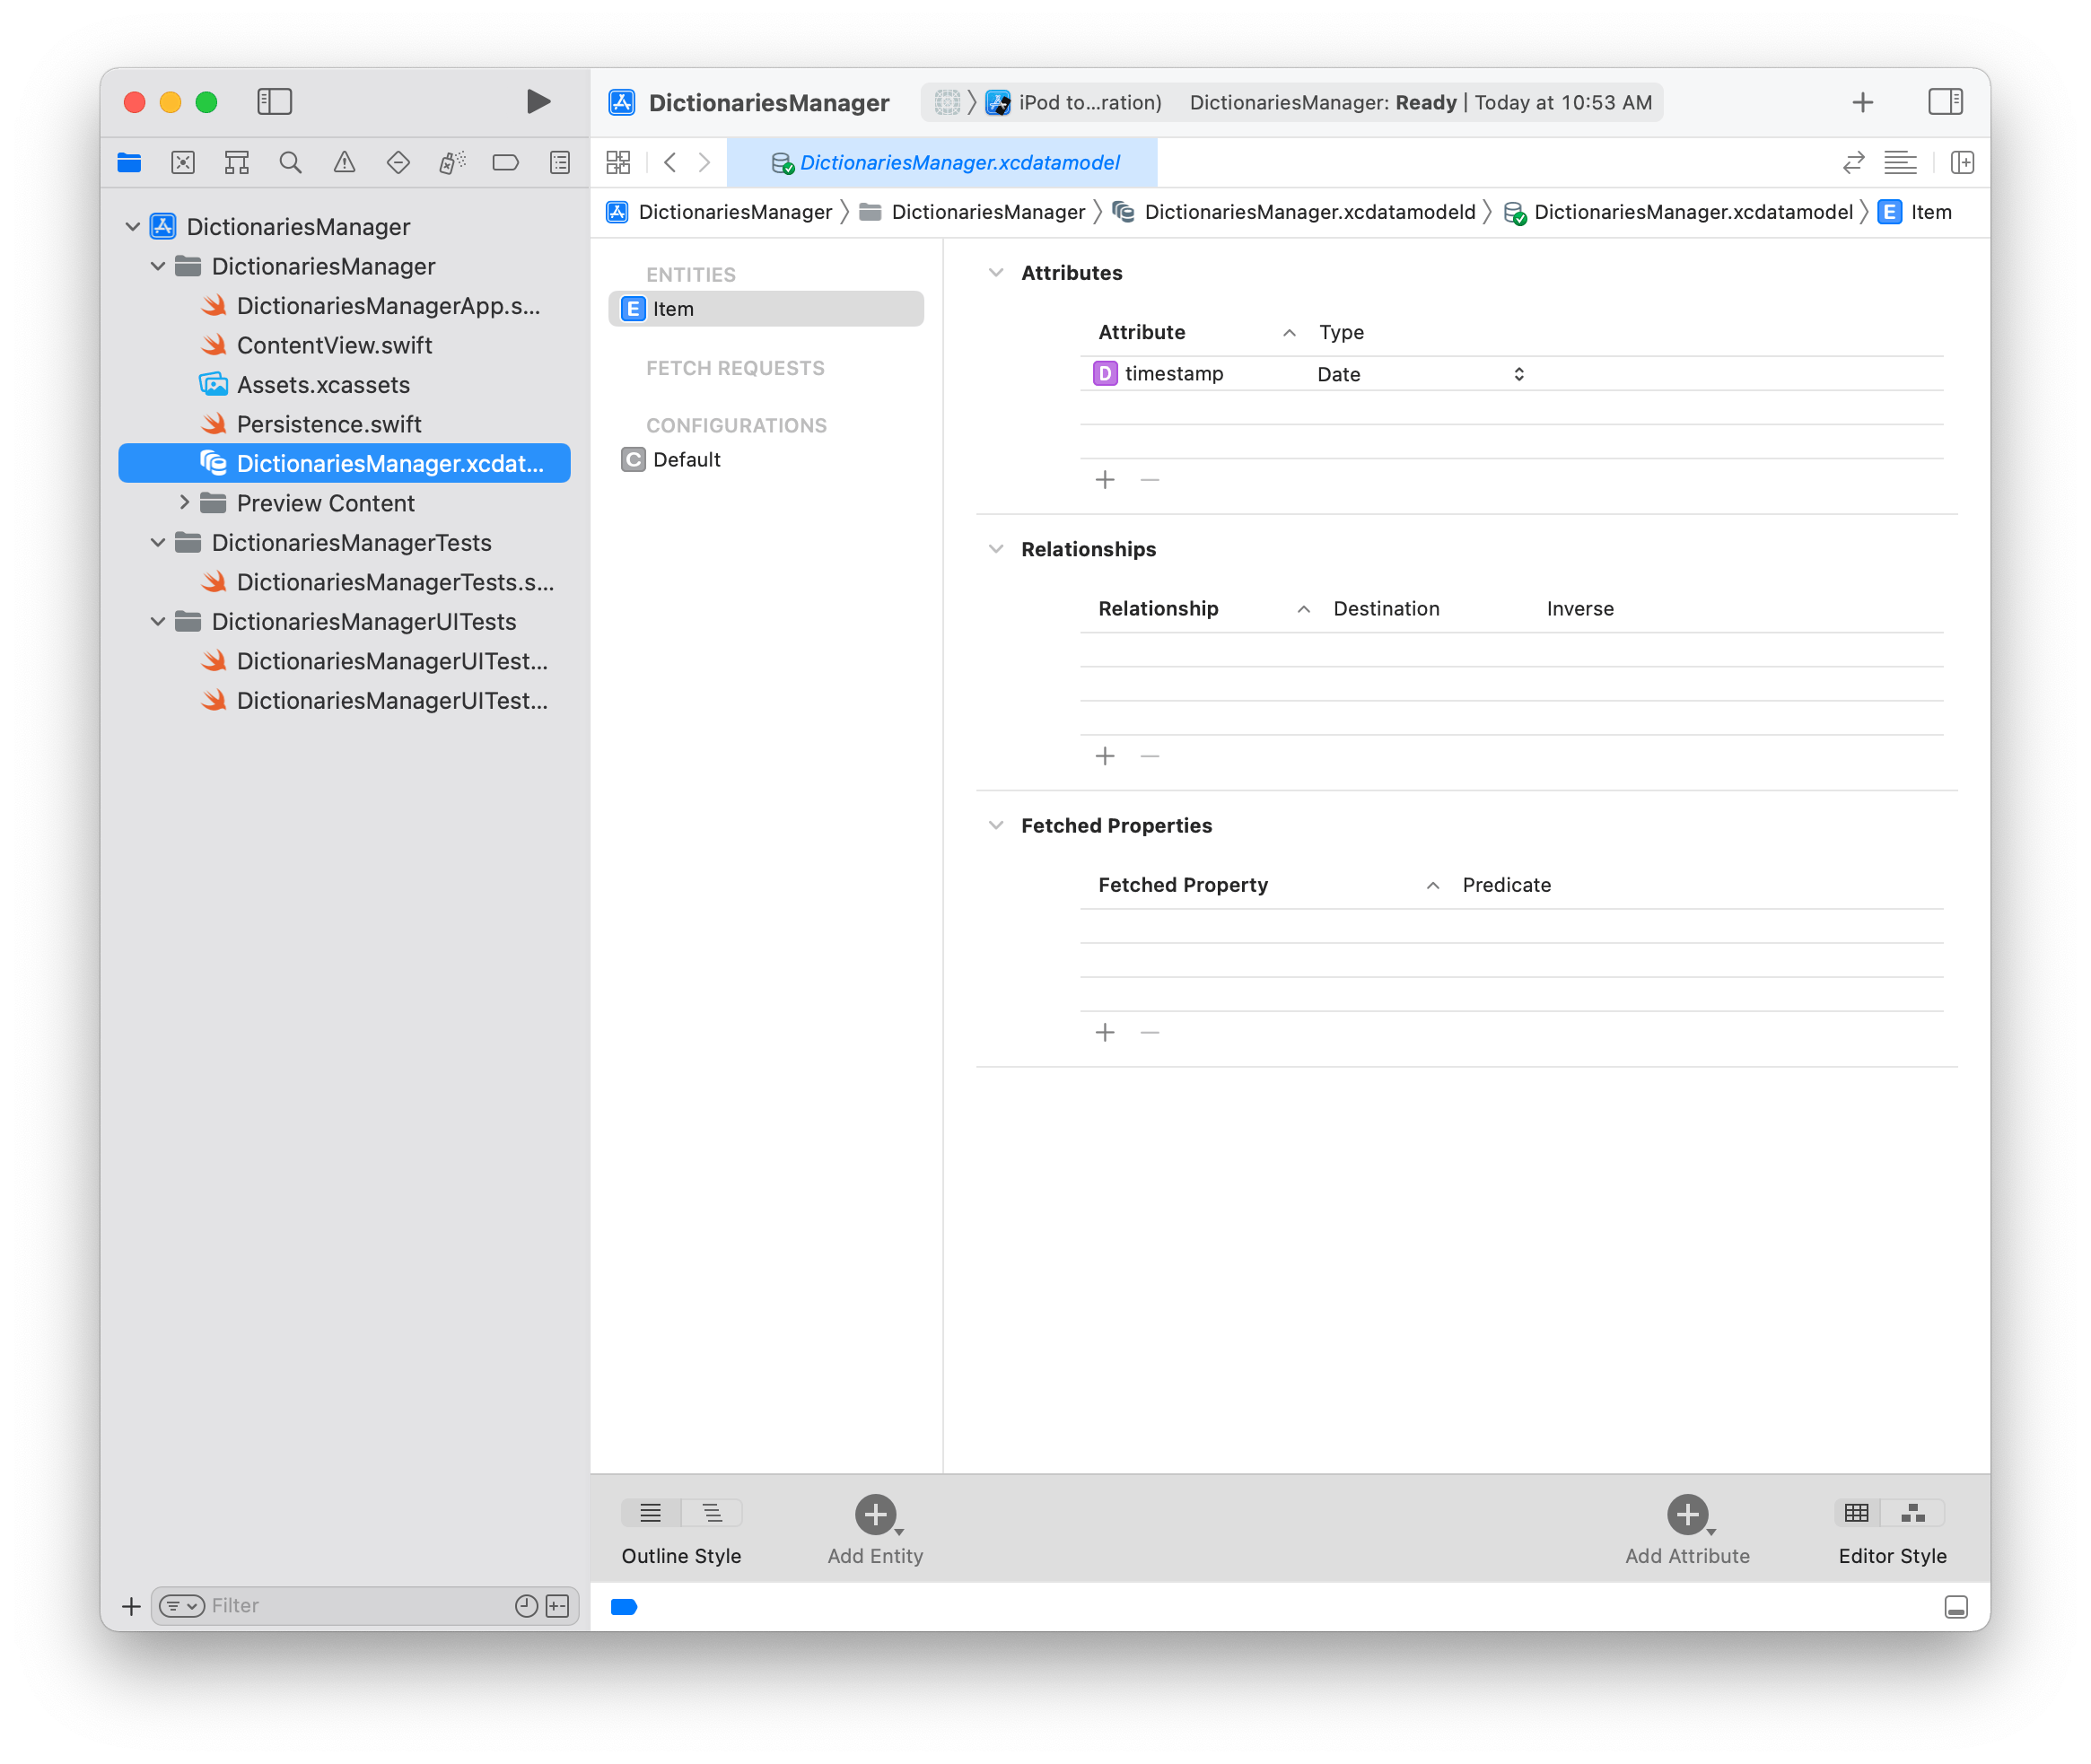
DictionariesManager.xcdatamodeld
这是一个图形化的建模工具,预先为你创建好了一个示例Entity,名称为Item。
Persistence.swift
这个文件非常关键,我认为改一点之后就可以直接放在生产环境里使用。看过有朋友发的老版本的模板,确实非常不完善。
import CoreData

struct PersistenceController {
    static let shared = PersistenceController()

    static var preview: PersistenceController = {
        let result = PersistenceController(inMemory: true)
        let viewContext = result.container.viewContext
        for _ in 0..<10 {
            let newItem = Item(context: viewContext)
            newItem.timestamp = Date()
        }
        do {
            try viewContext.save()
        } catch {
            // Replace this implementation with code to handle the error appropriately.
            // fatalError() causes the application to generate a crash log and terminate. You should not use this function in a shipping application, although it may be useful during development.
            let nsError = error as NSError
            fatalError("Unresolved error \(nsError), \(nsError.userInfo)")
        }
        return result
    }()

    let container: NSPersistentContainer

    init(inMemory: Bool = false) {
        container = NSPersistentContainer(name: "DictionariesManager")
        if inMemory {
            container.persistentStoreDescriptions.first!.url = URL(fileURLWithPath: "/dev/null")
        }
        container.viewContext.automaticallyMergesChangesFromParent = true
        container.loadPersistentStores(completionHandler: { (storeDescription, error) in
            if let error = error as NSError? {
                // Replace this implementation with code to handle the error appropriately.
                // fatalError() causes the application to generate a crash log and terminate. You should not use this function in a shipping application, although it may be useful during development.

                /*
                Typical reasons for an error here include:
                * The parent directory does not exist, cannot be created, or disallows writing.
                * The persistent store is not accessible, due to permissions or data protection when the device is locked.
                * The device is out of space.
                * The store could not be migrated to the current model version.
                Check the error message to determine what the actual problem was.
                */
                fatalError("Unresolved error \(error), \(error.userInfo)")
            }
        })
    }
}
这个 struce PersistenceController里的shared是一个static的let,使用这样的一个方式即完成了一个单例模式,这个PersistenceController不会再有子类什么,所以就使用了效率更高的struct。如果最终上线,一定要考虑把try viewContext.save()的cache写上你自己的消息,不要fatalError,因为这样会直接闪退,对于用户而言非常不友好。
除此之外,PersistenceController还提供了一个static var preview,用于在SwiftUI中Preview相关数据,其实也可以用于UnitText。它在初始化PersistenceController时加了inMemory的参数,使得最终的存储是数据库,而不是SqlLite,所以用完即焚,我也是看完这段code后,将相同的方法运用于Realm上,还真不错。
DictionariesManagerApp.swift
模板生成的App文件如下
import SwiftUI

@main
struct DictionariesManagerApp: App {
    let persistenceController = PersistenceController.shared

    var body: some Scene {
        WindowGroup {
            ContentView()
                .environment(\.managedObjectContext, persistenceController.container.viewContext)
        }
    }
}
值得关注的是它在App初始化时去将PersistenceController.shared赋值给persistenceController,这主要是static是一个惰性初始化,使用这一步来init PersistenceController。而之后的
ContentView()
      .environment(\.managedObjectContext, persistenceController.container.viewContext)
则是设置了一个全局的managedObjectContext环境变量,使得每一个View都可以通过这个环境变量来访问使用CoreData的context。
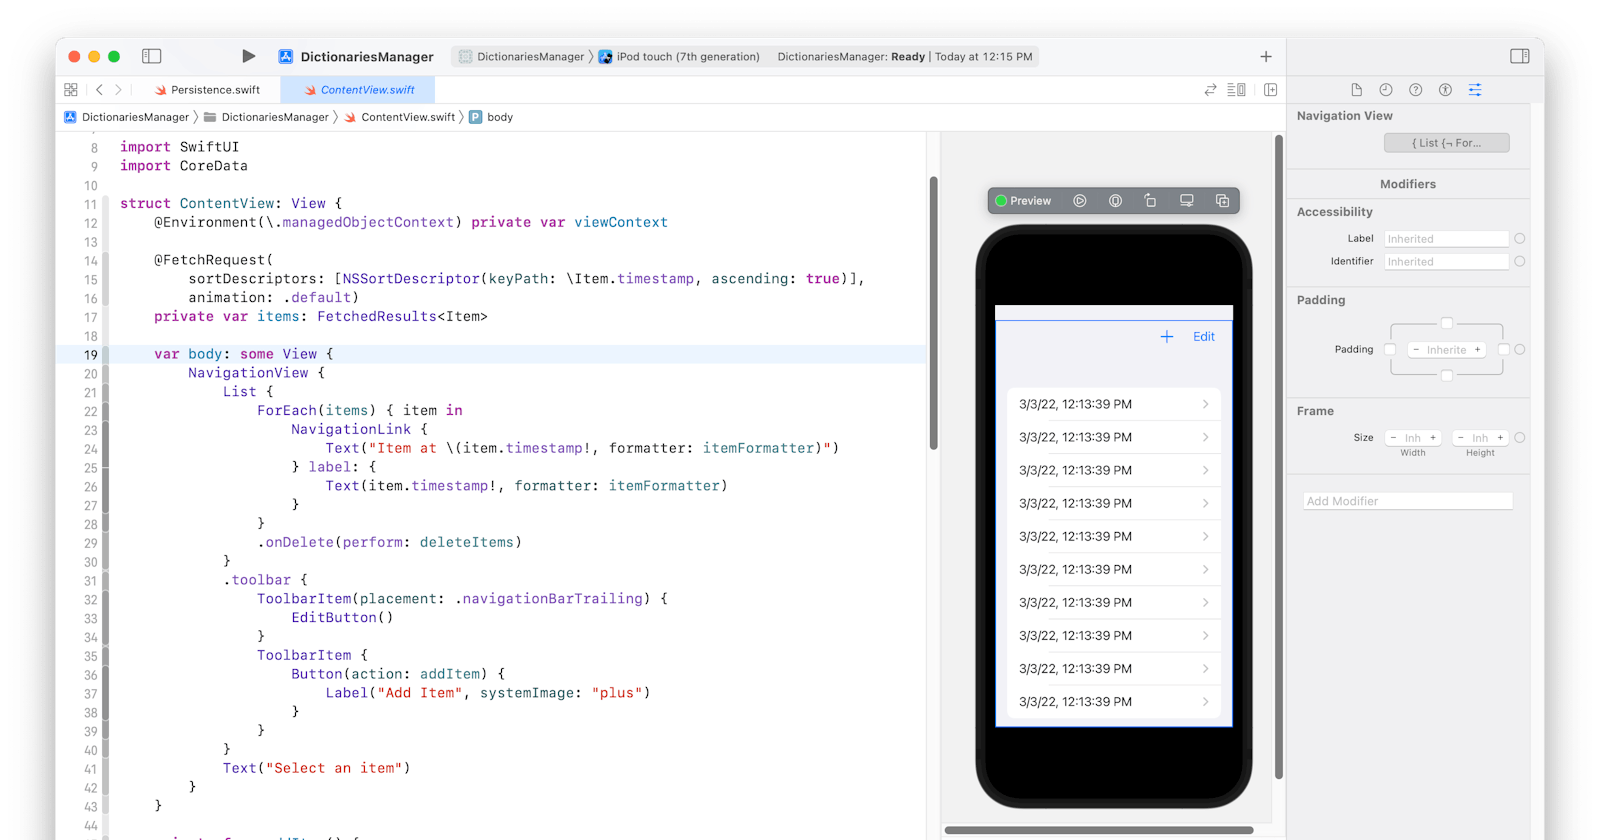
ContentView.swift
最后我们看看ContentView,模板提供了查、增、删的示例,代码如下:
import SwiftUI
import CoreData

struct ContentView: View {
    @Environment(\.managedObjectContext) private var viewContext

    @FetchRequest(
        sortDescriptors: [NSSortDescriptor(keyPath: \Item.timestamp, ascending: true)],
        animation: .default)
    private var items: FetchedResults<Item>

    var body: some View {
        NavigationView {
            List {
                ForEach(items) { item in
                    NavigationLink {
                        Text("Item at \(item.timestamp!, formatter: itemFormatter)")
                    } label: {
                        Text(item.timestamp!, formatter: itemFormatter)
                    }
                }
                .onDelete(perform: deleteItems)
            }
            .toolbar {
                ToolbarItem(placement: .navigationBarTrailing) {
                    EditButton()
                }
                ToolbarItem {
                    Button(action: addItem) {
                        Label("Add Item", systemImage: "plus")
                    }
                }
            }
            Text("Select an item")
        }
    }

    private func addItem() {
        withAnimation {
            let newItem = Item(context: viewContext)
            newItem.timestamp = Date()

            do {
                try viewContext.save()
            } catch {
                // Replace this implementation with code to handle the error appropriately.
                // fatalError() causes the application to generate a crash log and terminate. You should not use this function in a shipping application, although it may be useful during development.
                let nsError = error as NSError
                fatalError("Unresolved error \(nsError), \(nsError.userInfo)")
            }
        }
    }

    private func deleteItems(offsets: IndexSet) {
        withAnimation {
            offsets.map { items[$0] }.forEach(viewContext.delete)

            do {
                try viewContext.save()
            } catch {
                // Replace this implementation with code to handle the error appropriately.
                // fatalError() causes the application to generate a crash log and terminate. You should not use this function in a shipping application, although it may be useful during development.
                let nsError = error as NSError
                fatalError("Unresolved error \(nsError), \(nsError.userInfo)")
            }
        }
    }
}

private let itemFormatter: DateFormatter = {
    let formatter = DateFormatter()
    formatter.dateStyle = .short
    formatter.timeStyle = .medium
    return formatter
}()

struct ContentView_Previews: PreviewProvider {
    static var previews: some View {
        ContentView().environment(\.managedObjectContext, PersistenceController.preview.container.viewContext)
    }
}
这个代码也是将try中的内容稍做处理就可以改进为生产环境。重点主要有以下几部分:
从环境变量中取得context
@Environment(\.managedObjectContext) private var viewContext
查询
@FetchRequest(
        sortDescriptors: [NSSortDescriptor(keyPath: \Item.timestamp, ascending: true)],
        animation: .default)
    private var items: FetchedResults<Item>
在SwiftUI中提供了@FetchRequest来生成一个查询条件,即可将查询结果存于items中,在FetchedResults后指定了查询的Entity类型。示例中使用sortDescriptors来进行了排序,并没有做什么复杂的操作。
新增
let newItem = Item(context: viewContext)
newItem.timestamp = Date()
try viewContext.save()
非常简单的新增操作
删除
offsets.map { items[$0] }.forEach(viewContext.delete)
try viewContext.save()
这里的offsets是offsets: IndexSet,是由List中的.onDelete(perform: deleteItems)来调用的。相关文档可以看官方说明/)。
总结
官方在Xcode13以前给出的模板还非常糟糕,但是这个版本看起来还不错。